How to Paint Racing Stripes On Your Car

Jan 23, 2024

As an Amazon Associate, Modded gets commissions for purchases made through links in this post.
There’s nothing quite like the look of a set of perfectly crisp racing stripes on your favorite daily driver. Racing stripes on cars add a sporty element that takes car customization to the next level. Even if you never take your car to the track, you can enjoy racing stripes on your vehicle.
But if you’re going to do it, you need to ensure you have smooth, clean lines that look professional. For this, you must know how to paint stripes on a car. From vinyl wrap to spray paint, here’s how to paint racing stripes on your car that would make Briggs Cunningham proud.
Decide On Your Stripes
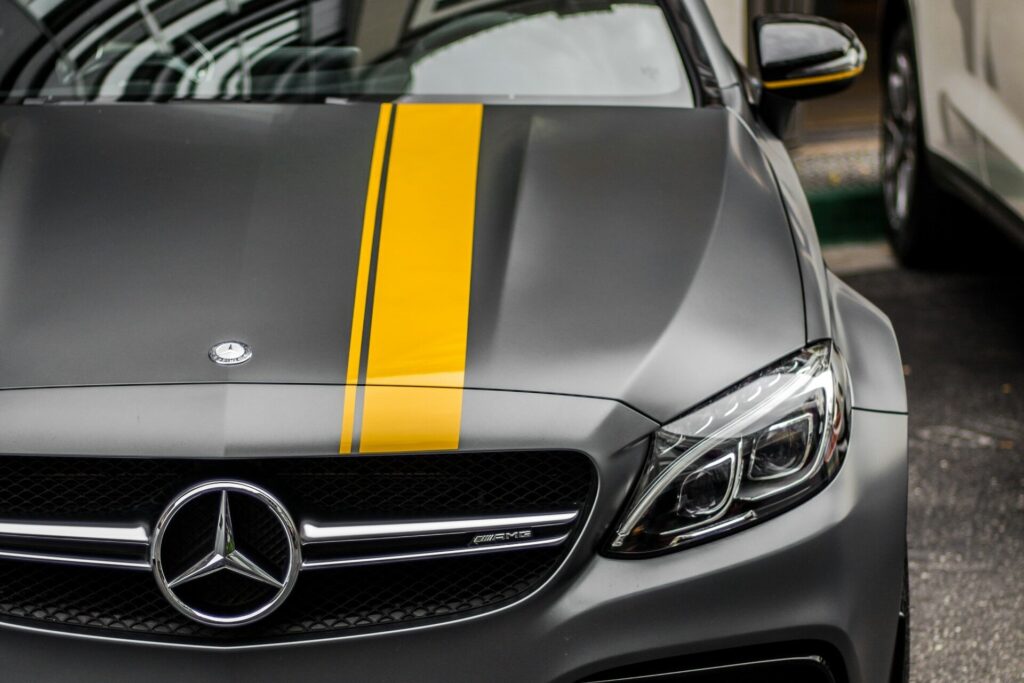
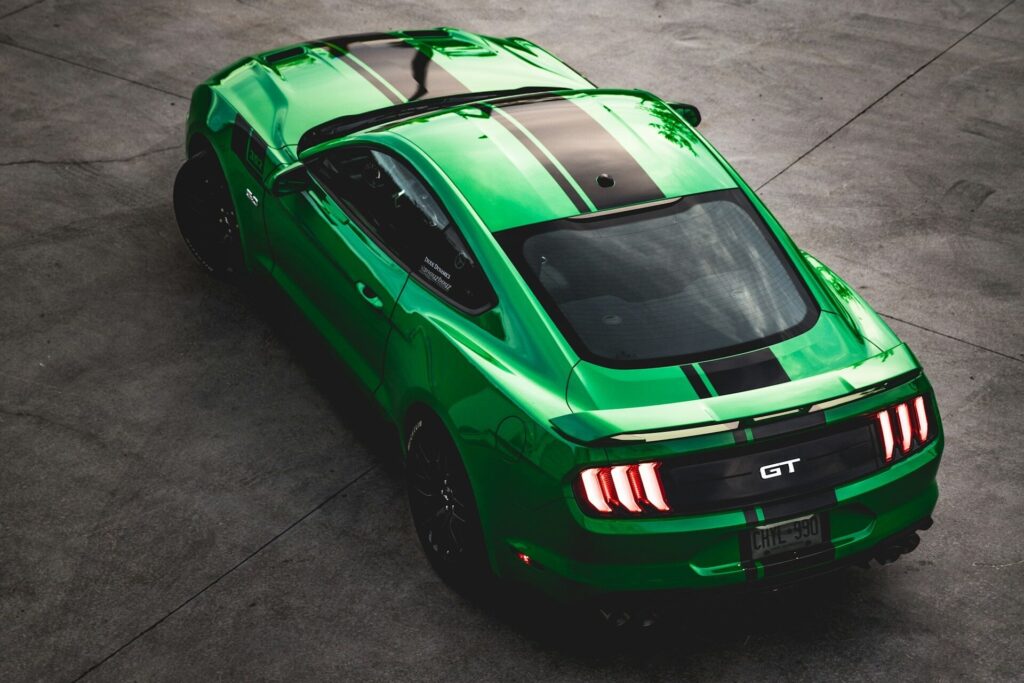
When putting racing stripes on your car, the options are endless. Several variations of the traditional two-line center stripe run down the center of the car from front to back. You can choose any color, style, or stripe size to represent your style.
Here are some of the styles of racing stripes for cars you might want to try:
- Two stripes in one color with a different color outlining each strip.
- One thick line and one thin line in different colors.
- One thick line with a different color outline.
- A different color line running between the two stripes.
- Bumblee stripes inspired by the 1968 Scat Pack Car consist of side racing stripes across the back of the car.
- Multiple stripes inspired by Jeff Koons’ explosion of stripes on the BMW M3 GTS.
It’s essential to decide what you want before the masking tape. While properly used painter’s tape won’t damage your car’s paint job, you’ll leave many sticky strips if you keep placing and removing the tape to get the perfect stripes.
How to Paint Stripes on a Car
Once you’ve decided on the racing stripes you’ll have on your car, the next step is prep work. Take as much time as you need to lay on the masking tape and mask off other areas you won’t paint.
Prep Your Car for Racing Stripes
First, clean your car to prevent road dirt, dust, dead bugs, and fingerprints from showing up in your finished work. Wash and dry the areas with automotive soap, water and a lint-free cloth.
Next use blue painter’s tape to map out where you’ll place the racing stripes. Double-check all your stripe lines and run a squeegee over the painter’s tape to ensure the masking is bubble-free.
Now you’re ready to paint!
Paint Your Stripes
Spray the racing stripe color in thin, even coats and let it dry completely. Pull the tape away to reveal clean, crisp lines you’ll be proud to show off while driving down the highway.
How To Use Vinyl Wraps for Car Racing Stripes

Sometimes, people opt for vinyl wraps because they’re easy to apply. They’re also more durable and may look more professional. Some manufacturers even sell kits for certain makes and models.
Prep Your Car
Once you determine where to apply the stripes, take inventory of any dents, scratches or rust spots. Before moving on, you must remedy these flaws and imperfections because the wrap needs a flat surface to adhere properly.
Next, clean your car to remove dirt, bugs and buildup. Rinse with water and use a wash and wax cleaning product to clean the surface. Rinse one last time and use a microfiber towel to dry it off. Repeat the process if you notice any stubborn streaks or gunk.
Place the Stripes
Make sure the car racing stripes are in good condition. If they begin to curl or crinkle, your workspace may be too hot or humid. In this case, you may have to find a cool, dry place like a garage to finish the job.
Next, place the stripes exactly where you want them and use masking tape to keep them in place. Ensure they’re straight and cut off any excess material before marking their positions with tape and removing them from your car.
Apply and Finish
Mist the application site with water and tape one end of each stripe to hold them in place. Then, slowly pull the release paper away and use a squeegee to press it to your car’s surface and remove any air bubbles.
Once your stripes are in place, remove the masking and backing tape. Then, smooth the wrap with a damp squeegee to ensure they are secure. And there you have it. Your whip has racing stripes now!
How to Spray Paint Racing Stripes On Your Car

The process of spray painting stripes is similar to applying vinyl decals. However, the entire job will likely take longer, especially since the paint must dry for at least a day before you hit the open road.
Prep Your Car
Prep your car the same way you would before applying vinyl decals. Rinse, wash, rinse again and dry. Once your hood is clean and free of dirt, debris, dents and rust, use painter’s tape to outline your racing stripes. Use the squeegee to firmly secure the tape.
Then, protect the rest of your vehicle from overspray by applying plastic sheeting. You can also lay a drop cloth around the base of your car to preserve your driveway or garage floor.
Apply Paint
Slip into some latex gloves — and a mask if you’re indoors — and shake your can of peel-coat paint until you hear the mixing ball rattle. Hold the can eight to 12 inches away from your hood and apply the paint using a back-and-forth motion. Aim for 50% coverage on the first pass. Then, allow that coat to dry before applying any more.
Four or more additional coats with about 10 minutes in between should be enough to create a solid stripe. However, applying more will make removing the stripes easier if you ever decide to peel them off.
Finish
After you’ve applied the final coat, allow it to dry almost completely before removing the tape. Doing so will ensure the paint’s still wet enough to peel off the tape without breaking the edges and dry enough to prevent gooey edges. Test pull a small, inconspicuous spot before peeling the rest of the tape back on itself to ensure proper timing, achieve clean edges and produce a more professional look.
Opt For Temporary Racing Stripes
If you’re leasing your car, permanent exterior changes aren’t an option without violating your leasing agreement. Thankfully, you’ve still got options. You can apply temporary racing stripes on cars with a black peel-coat which comes in an easy-to-use spray paint can. Follow the same steps as above — mask off your stripes, apply four to five coats of the peel coat and once it dries, carefully remove the painter’s tape before giving your new racing stripes at least 24 hours to fully dry. You can leave these temporary stripes in place for up to six months, then peel them off without damaging the paint or clear coat beneath.
Enjoy Your New Look
Whether you opt for temporary or permanent racing stripes, these accents can add attitude and color to your daily driver. Get creative and try a side stripe or go for a galaxy-themed stripe for a unique look. You may not take your care to the racetrack, but you can still enjoy racing stripes on your car.
Originally posted 5/4/2020 – Updated 1/23/2024