
As an Amazon Associate, Modded gets commissions for purchases made through links in this post.
Regular maintenance, such as checking oil levels or changing your engine coolant, not only helps your vehicle last longer and perform better, but it also provides peace of mind when you’re on the road. You know, for the most part, your car will not break down. Consistent maintenance also helps prevent major issues that could ruin your trip(s), like overheating, head gasket leaks, and much more.
Some may not know that the coolant system needs maintenance, including filling the fluids, sometimes changing, and flushing to remove contaminants that have built up inside. It is called a radiator flush. Moreover, the coolant levels need to be checked, not unlike oil, to make sure there are no serious leaks. So, knowing how to change your engine coolant, check coolant levels, and flush the system are critical skills. This informative guide is going to walk you through all of that. Let’s get started.
What Does Engine Coolant Do?
But first, a primer on engine coolant and the radiator. Exactly what does coolant do?
Engine coolant is a liquid added to the coolant system. It cycles through the radiator to prevent engine damage from freezing or boiling temperatures. Because the engine produces lots of heat while running, the liquid effectively transfers it away, keeping everything from overheating.
In cold climates, it’s designed not to freeze inside the engine while also protecting its components. That’s why it’s important to use the right type of coolant for your vehicle, but also the right type of coolant for the season and local conditions. Coolant will typically come in one of three types: Inorganic Additive Technology (IAT), Organic Acid Technology (OAT) and Hybrid Organic Acid Technology (HOAT). In most cases, a quick search online will tell you which is needed for your make and model.
While today’s advanced vehicles can sometimes go decades or longer without needing a coolant change, that’s not always the case. It’s still essential to check coolant levels to ensure there are no leaks and ensure you have the proper coolant in your vehicle. It’s also great to know how to change your engine coolant or check the levels in case of a problem.
Changing the fuel, oil, and air filters, rotating the tires, changing brake pads, monitoring the radiator and checking coolant levels are some of the most critical car maintenance items to consider.
Why Checking Your Coolant Matters
Your car’s cooling system is integral to normal operation, and the radiator and engine coolant play a big part. Combustion engines create energy by burning fuel, with combustion temperatures ranging from 2,000 degrees Fahrenheit to 4,500 degrees Fahrenheit. Engine coolant helps keep those temperatures regulated.
Your vehicle may overheat without enough coolant to transfer some of the heat away from the engine. Worse yet, that can eventually damage some of the engine’s components, leading to significant malfunctions later. There are a few reasons your car’s engine might overheat, but one of the more common causes is low coolant or a lack thereof.
A leak is also a problem, as eventually, enough coolant will not be left in the system. However, it can also be a source of contamination, dirtying the coolant fluid or making it less effective over time. Common signs of a leak include fluid puddles under your car, low coolant levels observed, an overheating engine, and a sweet smell around your vehicle. The only way to recognize these problems — before they create a massive headache — is to regularly check your coolant levels to ensure there’s enough in the system. While doing this, you can also check the coolant fluid’s color, which will give you some indication of your coolant system and radiator’s health.
How to Check Coolant Levels
From here on out, you’ll need a dedicated workspace, which means you might need to create one. The garage or driveway is a great choice, but you’ll need plenty of room and a safe, open area where nothing can get in your way. The good news is that once you have a spot, you can also use it for oil changes and other DIY car maintenance tasks.
Safety Tip: Don’t check your coolant levels while the engine is on, and if the car has been driven recently, let it cool off before you pop the hood.
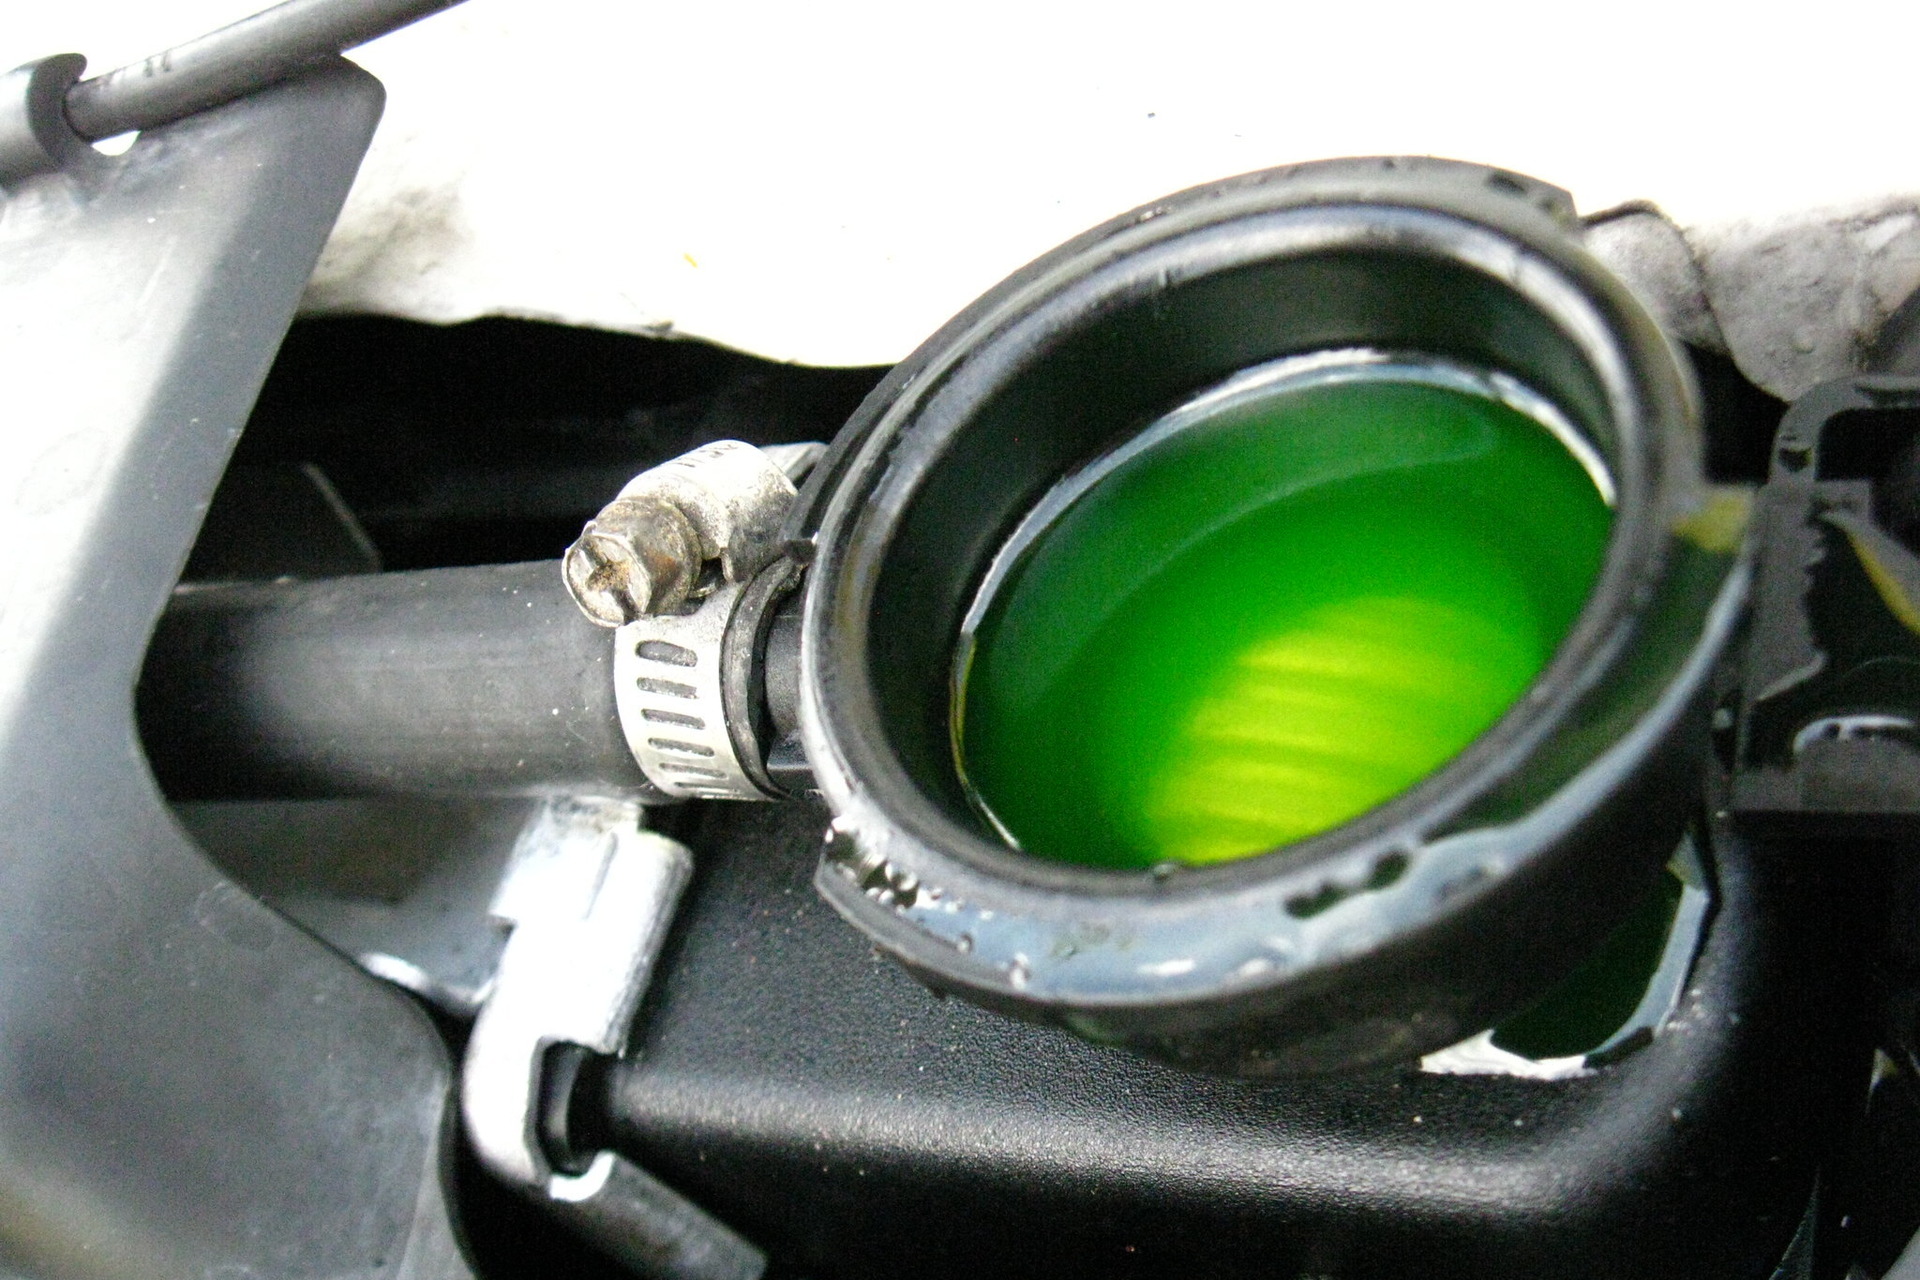
- Open the hood of your vehicle and identify the coolant reservoir. It’s a dedicated tank for checking coolant levels and refilling. Usually, it’s made of clear or white plastic.
- Carefully remove the cap from the reservoir and ensure it’s full of coolant. Coolant fluid comes in various colors, such as blue, red, green, or even yellow. Don’t be alarmed by the color itself.
- Inspect the fluid for discoloration. If you notice small particles, rusty residue, oils or sludge, it’s a sign that there may be a leak somewhere. If the coolant is colorless, that’s also a problem, and you’ll want to have your vehicle inspected by a mechanic.
- It’s okay if the coolant needs to be topped up a little. However, if fluid levels are extremely low, you have a leak. That needs to be repaired before you take any extended road trips. Optionally, you can also use a device called a “Coolant Tester” to assess the quality of the coolant in your system.

How to Put Coolant in Cars
Provided there are no major leaks, you can simply fill your vehicle’s coolant reservoir. While some older cars do not have a reservoir, it’s not common enough to be a problem.
It’s important to note that you cannot put pure, undiluted coolant fluid into the system. You must make a mixture of 50/50 concentrated coolant and distilled water or buy a diluted coolant solution from an auto store. Most modern forms of coolant come ready to use and are already mixed.
It is also important not to mix different types of coolant by putting more than one type in your vehicle’s system. If you change coolant fluid types, you must first flush out the system — which is precisely why we’re explaining how to flush coolant in this guide.
How to Change Engine Coolant
It depends on who you talk to, but most auto manufacturers recommend changing the coolant every 30,000 miles or so. Others, like Chevrolet, recommend flushing and changing at 150,000 miles.
You’ll first need to flush out the system to change the type of coolant fluid in your vehicle, such as going from a high-temperature solution to one meant for cold climates. The only exception is if you’re adding more of the same fluid.
- If the vehicle was recently used, turn off the engine and allow it time to cool down. When it’s ready, open the hood.
- Jack up the car and make sure it’s secure — so it won’t roll or fall.
- Locate the radiator and look for the radiator drain or petcock. It’s usually positioned on the low part of the radiator and held in place with a single screw.
- Position a large drain pan or bucket below the area and allow it to drain.
If your vehicle does not have a radiator drain, you’ll simply need to loosen and open a connected hose like the auxiliary coolant pump line. It will likely be messy and may take longer to drain.
With the old coolant drained, now’s a great time to flush out the system and clean it.
How to Flush Coolant Systems the Right Way
There are cleaning chemicals and mixtures you can purportedly use to flush out the coolant system, but your best choice will always be distilled water since that’s what you mix coolant with anyway.
If you opened a line or the radiator drain in the previous step, close everything back up before moving on with the flush.
- Fill the system with distilled water and nothing else by pouring it into the reservoir.
- Wait a minute or two, then start the car and let it run for a few minutes. That will allow the engine to heat up, open the thermostat, and cycle the distilled water through the system.
- Turn off the engine and let the car cool down.
- Once the engine is cool, you can drain the distilled water like you drained the coolant in the previous step. Open the radiator drain or use a hose if there isn’t a drain.
Pay attention to the water that drains out of the system. At first, it might have some color, but if it’s persistent throughout, you may need to do another flush. You’re good to go if you see clear water coming out. You can repeat the coolant flushing process as often as needed.
What Does It Mean to Bleed a Coolant System?
Bleeding or “burping” a system is necessary to remove air bubbles from a liquid or oil-based solution. For example, you may also need to bleed the brake lines when you change or adjust brake pads. Air bubbles in the coolant line can reduce efficiency, causing more overheating or component damage and may even result in catalyzed engine wear.
After flushing the coolant system, you should also make a habit of bleeding it.
How to Bleed Coolant Systems: Remove Air from the Lines
- With the car still jacked up, remove the radiator cap on top of the radiator. If there’s an overflow tank, remove the cap from that tank instead.
- OPTIONAL: If you have a newer vehicle, locate the bleeding valve on the radiator. This is optional because not all cars have one. It looks like a small screw protruding out. Open the valve before adding coolant by loosening it. You may hear air escape before coolant leaks out.
- Using a funnel that fits perfectly inside the cap hole — you may need an adapter to create a tight seal — slowly pour coolant into the system. You want to add about two to three liters per minute, enough to cycle the coolant and create a flow but steady enough so you’re not adding more air bubbles.
- Pour until the coolant level reaches the ‘full’ mark on the inside of the tank, if using the overflow tank, or until it brims at the top of the radiator. Leave the funnel and seal in place. If you’re using the bleeding valve method when you see pure coolant leaking out and no air, you can close the valve.
- Clear the engine, turn on the car and crank the AC to full heat. This will open up the heater core, and you can rev the engine a little to speed up the process.
- As the engine heats, bubbles may appear or “burp” out of the funnel. You want this, and the process is bleeding out the air.
- The coolant may rise or fall. This is okay. However, if the coolant in the reservoir drops below the “full” mark, add more and continue bleeding.
- Turn off the engine and let it cool down. The coolant level may drop as it cools. You can top up with more, but be careful not to overfill.
- Remove the funnel and close up the tank(s) or system when finished.
That’s it! You’ve bled the air bubbles out of your radiator and coolant system.
How to Change Engine Coolant: Refilling the System
If you followed the steps to flush out your system and bleed the air bubbles, your coolant should have already been replaced. If not, the best way to refill and refresh coolant is to simply pour it slowly into the main reservoir or tank.
Remember, you must use the same coolant, and you should never mix different types together and add them to the system. Just the standard 50/50 mixture with distilled water and concentrated coolant will do.
Take It for a Drive!
Now that you’ve learned how to change your engine coolant and done the maintenance, it’s time to enjoy the fruits of your labor. Start up the car and take it for a nice drive. As a reward for your hard-earned time, get yourself a cold beverage or some ice cream.
Remember, just like the oil, windshield washer fluid, and other fluids in your vehicle, you should check the coolant levels from time to time. This is to help spot a leak early before it causes damage and ensure there’s enough coolant in the system to keep it running optimally. You can also quickly check for residues, sludge, and other contaminants that might have made it into the coolant from a leak.
Regularly scheduled maintenance is the way to go, helping you catch potential problems before they become a major hindrance. This is especially important if it’s your primary vehicle, as you want to keep it running for years to come.
Not sure that coolant is really your issue? At Modded, we’ve got you covered. Check out our list of common car engine problems (and how to solve them) or go beyond the engine with our list of DIY car repairs anyone can take on.


